|
|
|
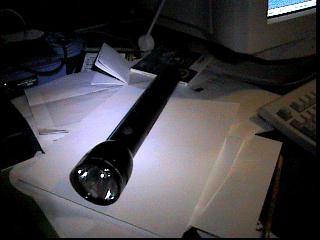
This modification will install a Luxeon LED into a 3D cell MagLite.
Please read all the instructions before attempting the modification.
This direct drive mod has only been tested on the late shipping 'puke green' Luxeons.
Before direct driving white/blue or any Luxeon, it is highly recommended that you first test current with a one ohm resistor. The 'pea green' one I used may just be a fluke with higher than normal internal resistance, so always measure first with atleast 1 ohm in the circuit. Limit current at, or below 700ma max.
On the white Luxeon (with blue tint) I tested, I found 700ma draw with fresh batteries on one ohm, (drops to 650ma in a few minutes) so I installed a one ohm resistor in the PR bulb base to keep the current at or below 700ma at all times. Not true 'direct drive', but one ohm isn't much. Batteries will last a tiny bit longer. This is by far the brightest Luxeon mod I've made yet.
Tools and supplies required:
1.36" round heatsink - available 2 each w/rubber tire thru lambda@mchsi.com for $3.00 postage paid
Flat mill file
Devcon 2 ton epoxy glue
5 minute epoxy
Artic Silver, or other suitable low thermal resistance compound
22 gauge insulated wire
Soldering iron and solder
Dremel tool with cutoff wheel, or similar cutter
220 and 400 grit sandpaper
Electric drill - variable speed recommended
1/16" drill bit
3/16" drill bit or metal rod
Helpful items:
3/8" metal or plastic rod
Rubbing Alcohol
Multimeter
Small 3/4" rubber tire
Toothpicks for mixing epoxy
Beer
Making the power connection:
First, remove the bulb from the flashlight. Place it in a small plastic bag (to prevent glass from flying around) and break the bulb. (I usually just rap it with a screwdriver handle). Remove and dig out any remaining glass or potting glue in the base. Using insulated AWG 22 wire, attach two six inch wires (strip to 1/4" and tin the ends with solder first) to the PR bulb base; the positive center wire should be epoxied into the base (I usually put a couple layers of heat shrink tubing (shrunk down by heating) to help fill up the base, and slow the flow of epoxy through it). You do not want any epoxy above the top lip of the PR base. I usually epoxy the top first, then after that sets up, turn it over and epoxy the bottom. Leave the 1/4" exposed wire sticking out the base to later form the positive contact. 5 min epoxy is ok to use here.
After the epoxy sets up, curl the positive wire to form a small ring on the bottom of the bulb base and solder a blob of solder onto it to form a contact similar to the original bulb's contact. Clean and file as necessary. Install and test for good contact into the MagLite; test for voltage with a meter to ensure it is working (too short a positive contact can cause faulty/poor/no connection problems). Remove the bulb base/wires from the flashlight.
Preparing the Maglight for conversion:
Using 220 grit, or similar, sandpaper, sand and remove all the black coating inside the body down to the bare aluminum approximately 3/4" into the tube surrounding the bulb socket. The bulb socket is spring loaded, and can be pushed down and held out of the way by wedging something against the cam button the reflector pushes on to focus a beam. I used a very small rubber VCR tire stretched over the bulb post to hold it down, but duct tape, or other methods can be used (just remember it will need to be removed after sanding). I found the sanding to be the hardest part of this mod. You may want to sit and watch TV while doing this; it took me about 20 min of work to get completely down to the bare aluminum.
Trimming the Reflector:
| 
|
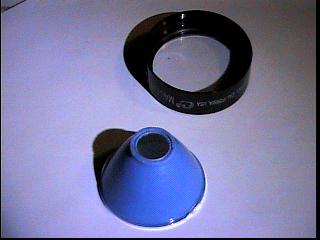
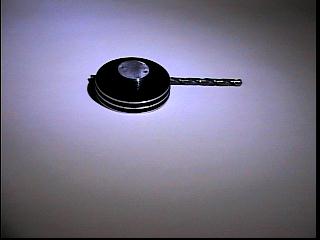
Trim the plastic reflector as shown in the photo. Trim to within 1/16" of the hole. I used a Dremel with cutting wheel in a drill press; adjust cutter to height, then just slowly rotate the reflector against the cutter until it cuts through all the way around. Clean and blow off any dust from the cutting. Test fit the button of the heatsink into the hole of the reflector; twisting back and forth if necessary to allow the reflector to thread onto the button enough that the top of the heatsink button is flush with the top of the hole inside the reflector. Re-assemble reflector into the head assembly.
Fitting the heatsink:
A note about the heatsink theory used in this mod: The tight fit of the heatsink into the flashlight body is used to ensure good heat transfer from the heatsink to the flashlight body. Also, as the heatsink warms, the round fins will expand slightly, further pressing them against the flashlight body.
| 
|
First, file the white layer of the top of the heatsink. Continue to file until the top is smooth and perfectly flat. Finish surface with 400 fine sand paper for best results; remember, the smoother the surface, the better it transfers heat.
Test fit the heatsink to the MagLite tube; it should be a few hundredth of an inch too big to fit. Note about how much will need to removed from the diameter to make it fit. Turn the heatsink upside down, and locate a 3/16" drill bit, or similar metal rod, that just fits into the hole in the bottom of the heatsink. I used a small amount of epoxy to glue the drill bit in for a tight fit. Using 5min epoxy, mix and wait until it begins to thicken (we don't want too good a glue job, as it will need to be removed later), then apply a small amount to the drill bit shaft (not the drilling end) and insert it into the hole in the heatsink. Make sure the drill bit is straight into the heatsink, and does not lean one way or another. I placed it in a vise and inspected for correct fit. Allow about 10 min for the epoxy to set up.
Place a mill file flat on a table or floor. Insert the drill bit/heatsink into a drill and check for smooth rotation without wobble in the drill. It may be necessary to re-chuck (hand tighten) several times to get the fit correct on the drill bit lands. Tape (or just hold) the file in place. Carefully reduce the diameter of the heatsink by spinning it in the drill against the file. Use medium speed and very light pressure. Keep the drill 90 degrees to the file as much as possible; any leaning and the three fins will be filed to different sizes, which we don't want. Periodically, stop and test fit the heatsink into the MagLight. Continue filing until the heatsink just fits into the tube; best fit is such that it does not drop right in, but requires a little wiggling and playing around to get it to slide into the tube part way (don't force it! it needs to come back out), so don't file too much.
Once the proper fit has been achieved, remove the drill bit immediately before the epoxy sets up anymore. Hold the heatsink and heat the drill bit with a Bic lighter next to where it enters the hole in the heatsink; heat about 6 to 8 seconds, then grab with pliers and twist out. Clean left over epoxy from back of heatsink.
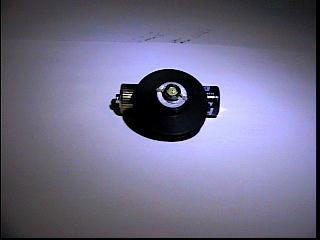
Using a 1/16" drill bit, drill two holes through the heatsink button and out the back of the heat sink as shown in the photo. These holes will be used to run the wires to the Luxeon.

| 
|
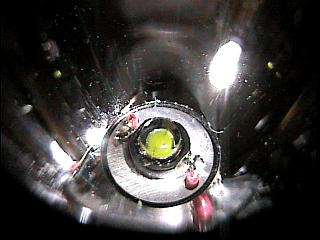
Mount the Luxeon in the center of the heatsink as shown in the photo. Use Devcon 2 ton epoxy, or similar slow setting epoxy, mixed with a small amount of Artic Silver heatsink compound to make it thermally conductive. (I've noticed that Best Buy now carries Silver thermal paste, Antec I believe is the brand; it's 99% microfine silver particles, mixed with an electrically insulative silicone grease - same as Artic Silver). Silver paste such as this is 20 times more heat conductive that the regular white silicone type and really does make a difference, but the white probably would work too, but I don't know that for a fact.
When mounting the Luxeon, it's best to have a light directly overhead to help center it perfectly. Light coming from an angle can cast shadows that will fool your eyes when trying get it dead center. The better it is centered, the better focused the light spot will be. Apply a drop of the epoxy/silver paste to the Luxeon's metal stud, and mount it on the heatsink. Carefully center the Luxeon, (pay attention to the wire holes/lead positions as shown in the photo) and then press down firmly to get the layer of epoxy between the Luxeon and heatsink as thin as possible. You should feel it seat itself by lack of side to side motion when it bottoms out. Inspect and ensure the Luxeon is still centered, adjust by carefully sliding (do not pull upwards) as necessary. Allow the epoxy/silver paste to setup before disturbing (when mixed with thermal compound, the epoxy sets up slower).
Final Assembly:
First, install the bulb base/wires and test the Luxeon to verify polarity; it will be next to impossible to fix if assembled with incorrect polarity. Use something to hold the bulb socket all the way down at the bottom of its spring travel. Again, I used a small rubber tire stretched over the post to accomplish this.
Thread the wires through the back of the heatsink and re-verify polarity is correct. Slide the heatsink down the wires to the top of the tube; apply a liberal bead of silver heatsink compound to the edge of each of the three heatsink fins and work the heatsink down into the tube. It will probably be necessary to us a metal rod to tap the heat sink all the way in if sized properly. Do not hammer, tap lightly as not to distort the heatsink. (Do not pound it down too hard, as you may cut/short the wires between the heatsink and lamp holder.)
Pay close attention to the wires so they slide out as the heatsink is lowered into the tube. The heatsink should stay in place on it's own, if not, you filed too much, and will have to hold it down for the next part. Wipe the inside of the flashlight tube to remove any silver paste present. Clean with alcohol to remove residue (no, beer is not a substitute, us rubbing alcohol) Mix another batch of epoxy/silver paste and apply all the way around the heatsink where it contacts the inside of the tube. Let the epoxy set up.
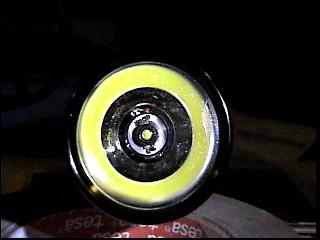
Once the heatsink is in position (about 1/2" into the tube) trim the wires to about 1/4" above the heat sink. Carefully strip the wires, leaving some insulation about 1/32" sicking out of the holes, so the wires do not short to the heatsink. Carefully bend the wires at a 90 degree angle onto the Luxeon leads. Very carefully bend the Luxeon leads around the wires and solder as shown in the photo; check for clearance between leads and heatsink to prevent shorting.

| 
|
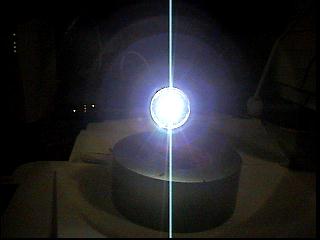
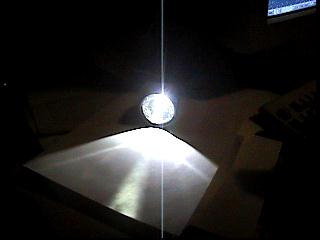
Test to ensure the Luxeon lights up. Install head assembly and carefully tighten all the way down. Do not use too much force, as the epoxy needs 24 hours to set up before becoming rigid. If everything is assembled correctly, when tightened down the beam spot should be in perfect focus. The spot may be adjusted to flood by loosening the head assembly a few turns; just as the head assembly begins to screw off the o-ring is where the 'dead spot' in the center of the beam should show up. The base of the plastic reflector can be filed/trimmed if the above focusing is not perfect as stated.
Note: you should allow 24hr set up time for the epoxy to properly harden before operating the light more than a few seconds at a time to ensure proper bonding of the Luxeon to the heatsink.
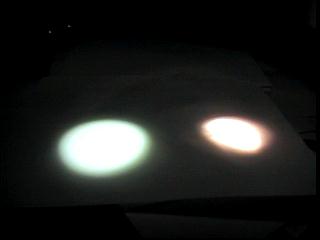
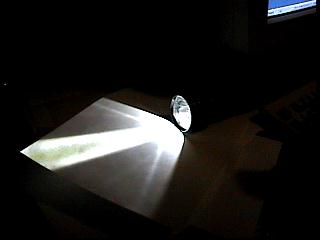
You should now be in possession of the brightest solid-state flashlight on your block. Go outside in the dark and scare the neighbors with the "alien" light (as described by some of my tormented neighbors).
| 
|